How It Works
We're asking people to share where they are having climate conversations on this map, so that we can all be inspired by the networks of hope, change, and connection that are forming all around us. Using Google My Maps, you can add a point to the map documenting your conversation. This can be as formal as a card game you played at a Climate Conversations table, or as simple as a quick convo with a friend about crazy weather conditions. The point is to build connections with people about climate change, and see where others are doing the same!
A few things to keep in mind before you start:
1. To be mindful of your privacy and the privacy of others, approximate the location of your conversation, rather than putting the actual address on the map, unless it is a public place.
2. You can add photos of your conversation, but only with permission from others who may appear in the photo.
3. Feel free to add any descriptions of your conversation that you think are relevant, but again, be mindful of people's privacy.
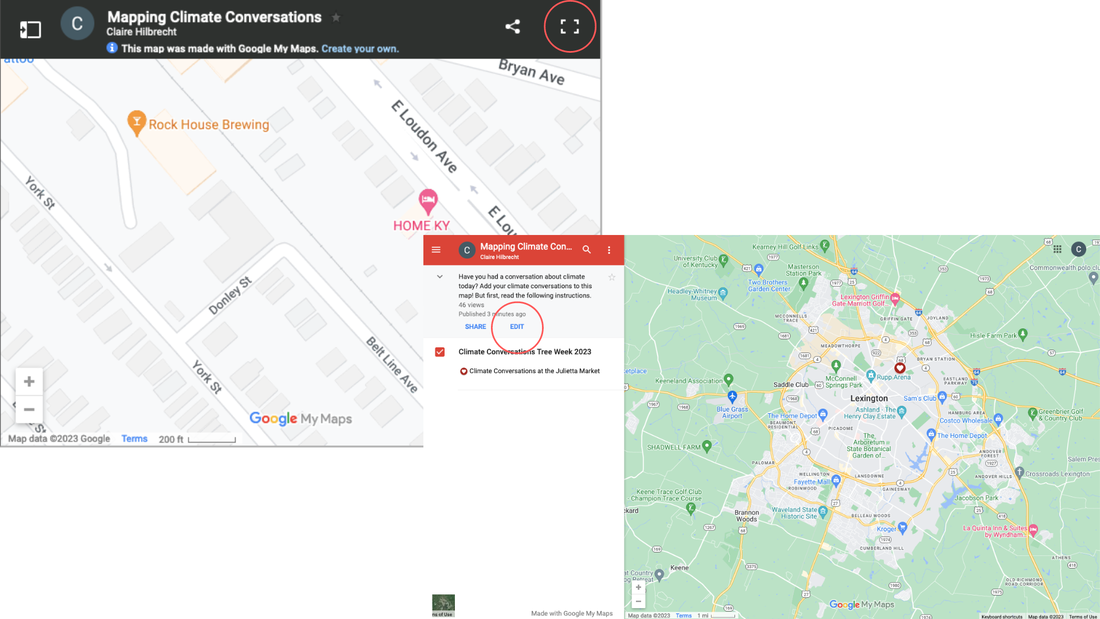
Step 1: Accessing the map
Open the map in a separate window by clicking on the "view larger map" icon on the right-hand side of the map. Then, click "edit."
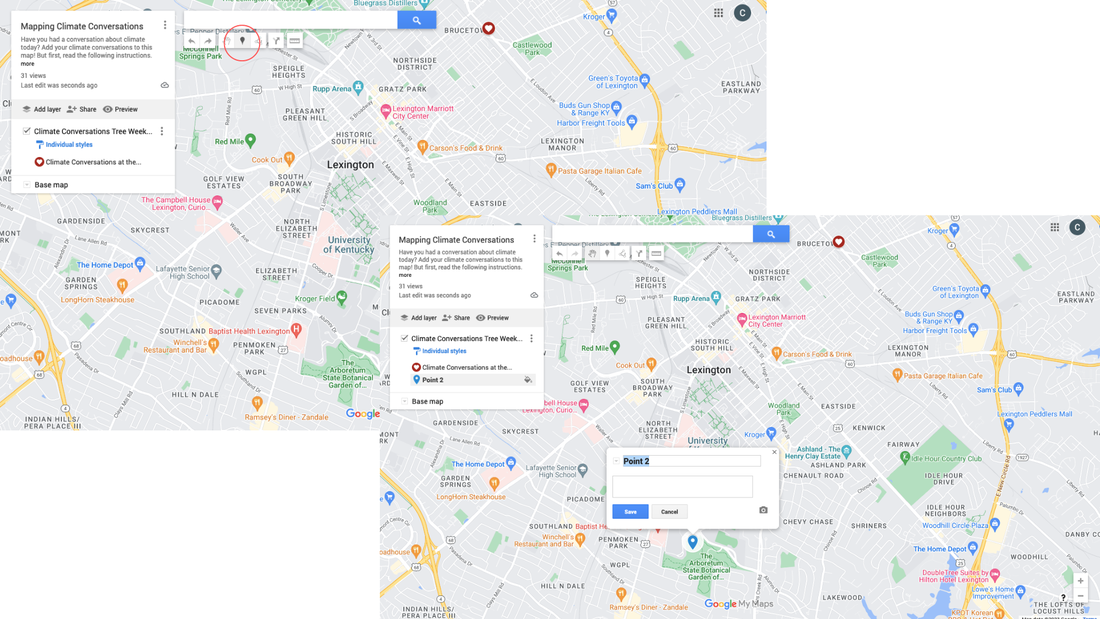
Step 2: Adding a point to the map
Add your conversation to the map by clicking on the "add marker" icon underneath the search bar. Locate where you want to put your point (again, being mindful of privacy), and right click to add.
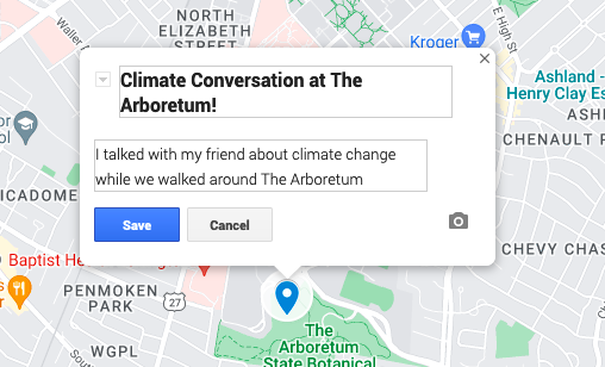
Step 3: Adding a title and description to your point
Add some information about your climate conversation by filling out the title and description text boxes. This can be what you learned, how you felt, or anything else you want to share about your experience! Click "save" when you are finished.
Step 4: Adding photos to your point
You can add photos to your point by clicking the camera icon at bottom right-hand side of the edit box and choosing an image to upload. Just make sure you get permission from others before putting their images online!

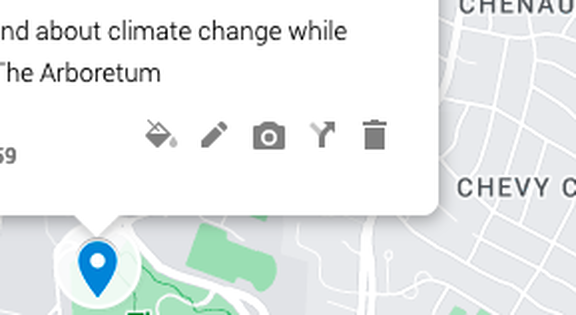
Step 5: Customizing, editing, or deleting your point
You can customize your point's color or icon by selecting the paint bucket tool. You can edit your point using the pencil or delete it using the trash can.